")

Capturing your screen should feel effortless, whether you are saving important information, sharing something with a colleague or creating content for your blog. If you are searching for how to screenshot on HP, this guide gives you clear, practical methods that work on both Windows 10 and Windows 11 devices.
Unlike generic guides, this page focuses on real user needs, HP specific keyboard behavior and smart techniques that save time. By the end, you will know exactly how to take screenshots on any HP laptop, desktop or even tablet.
Why Take Screenshots on Your HP Laptop?
Screenshots are more than just images. They are a quick way to communicate and store information.
Here is why they matter:
- Save important data instantly without copying text
- Share error messages with support teams
- Capture online receipts and documents
- Create tutorials or blog content
- Keep visual records for work or study
If you use an HP laptop daily, knowing multiple screenshot methods gives you flexibility and speed.
Method 1: Using the Print Screen (PrtSc) Key
The Print Screen key, often labeled as PrtSc, is the most basic way to take a screenshot on an HP laptop. It works on almost all models and is perfect for quick captures.
Full screen capture
- Find the Print Screen key on your keyboard, usually in the top right area
- Press it once to capture the entire screen
- Open Paint or any image editor
- Press Ctrl + V to paste the screenshot
- Save the file, preferably in PNG format for better quality
Capture only the active window
- Click on the window you want to capture
- Press Alt + Print Screen
- Open an editor like Paint
- Paste using Ctrl + V
- Save the screenshot to your device
Important tip for HP users: If the key does not respond, press Fn + Print Screen instead. Some HP laptops require this combination due to keyboard settings.
Method 2: Windows + Print Screen Shortcut
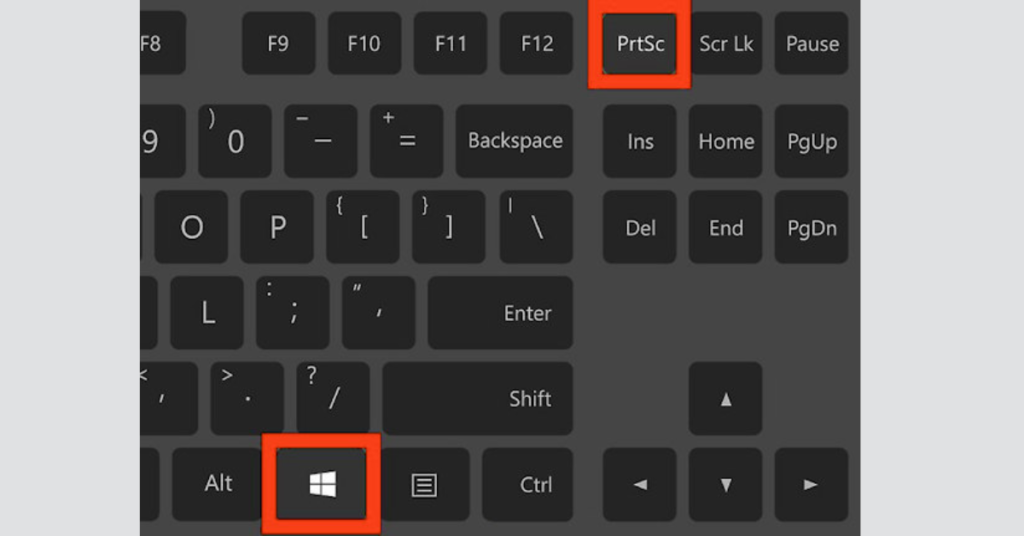
If you want a faster and more efficient way to save screenshots, this built in Windows shortcut is one of the best options. It is especially useful when you need to capture multiple screens quickly without extra steps.
- Press Windows + Print Screen at the same time
- Your screen will briefly dim, confirming the screenshot has been taken
- The image is saved automatically without needing to paste it anywhere
- You can find it in the Pictures folder inside Screenshots
- Files are saved in PNG format for better clarity and quality
This method saves time because it skips manual pasting and editing. Each screenshot is automatically organized and numbered, making it easy to manage multiple captures efficiently.
Method 3: Using the Snipping Tool
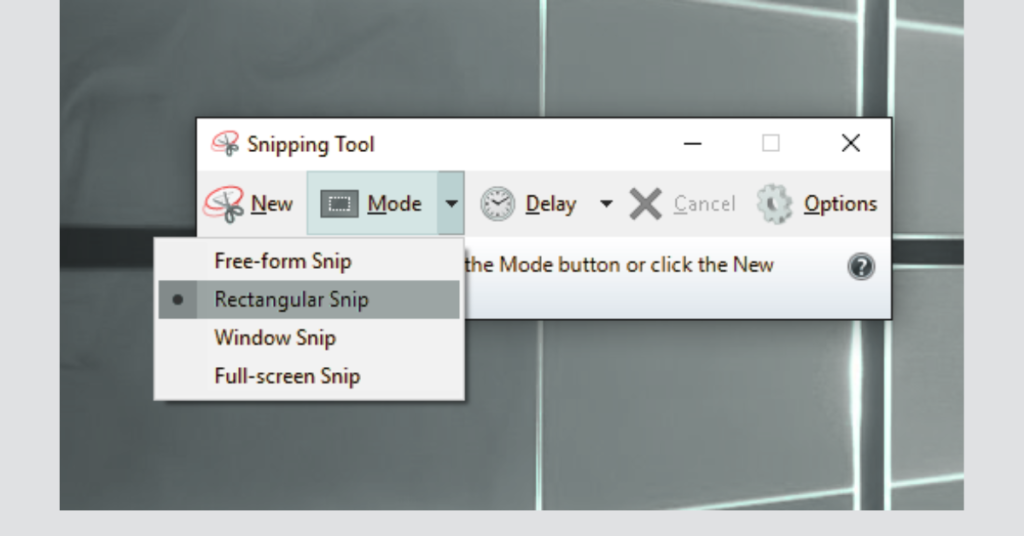
The Snipping Tool is a built in Windows application that allows you to take more precise and customizable screenshots. It is a great choice when you do not want to capture the entire screen and need better control.
- Search for Snipping Tool in the Windows search bar and open it
- Click New to start a new screenshot
- Select the type of snip you want
- Rectangular snip to capture a specific area
- Free form snip for irregular shapes
- Window snip to capture a single window
- Full screen snip to capture everything
- Drag your cursor to select the area you want
- Use simple editing tools like pen, highlight, or erase if needed
- Save the screenshot to your preferred location
This method works best when you need accuracy and quick editing in one place without using third party tools.
Method 4: Snip & Sketch (Windows 10 and 11)
Snip and Sketch is a built-in Windows feature designed to make screenshot capturing faster and more interactive. It offers a cleaner interface and better editing tools compared to older options, making it ideal for users who want to quickly capture and mark up screenshots.
- Press Windows + Shift + S to open the tool
- Your screen will fade slightly and a small toolbar will appear at the top
- Select the type of screenshot you want
- Rectangular snip for a selected area
- Free form snip for custom shapes
- Window snip to capture a specific app
- Full screen snip to capture everything
- Choose the area you want to capture using your cursor
- Click the preview notification that appears on your screen
- Use built in tools to edit your screenshot such as pen, pencil, or highlighter
- Save the image or share it directly from the app
This method is perfect for users who want quick access, flexible capture options, and instant editing without using any external software.
Method 5: HP’s Built-in Screenshot Tools
Many HP laptops include built in features that make taking screenshots even easier, especially when combined with HP specific functions or software.
- Look for a camera icon on one of your function keys, often F12
- Press the function key that includes the camera icon
- If your model supports it, use the HP screen capture option
- Follow the on screen prompts to save your screenshot
Some HP laptops may also include tools like HP Support Assistant or other preinstalled HP software, which can help with screen capture or make it easier to manage and share screenshots.
Advanced Screenshot Tips for HP Laptop Users
To improve your screenshot workflow, keep these tips in mind:
- Use PNG format for better image quality
- Organize screenshots into folders for easy access
- Use keyboard shortcuts for faster results
- Capture only the necessary area instead of full screens
- Use built in editing tools for quick annotations
Useful Shortcut Summary
PrtSc for full screen capture
Alt + PrtSc for active window
Windows + PrtSc for automatic saving
Windows + Shift + S for advanced snipping
Fn + PrtSc if the key requires function mode
Final Words
Taking screenshots on an HP laptop or desktop is simple once you understand the different methods available in Windows 10 and Windows 11. Whether you use the Print Screen key, Windows shortcuts, Snipping Tool or Snip and Sketch, each method is designed to make capturing your screen quick and convenient.
If you need fast full screen captures, keyboard shortcuts like Windows + Print Screen are the best option. For more control and precision, tools like Snipping Tool and Snip and Sketch give you the flexibility to capture exactly what you need and even edit it instantly.
No matter your use case, whether it is work, study, troubleshooting, or content creation, mastering these methods will save you time and improve your productivity. Once you get comfortable with these shortcuts, taking screenshots on your HP device becomes a natural part of your daily workflow.
FAQs
How can I quickly take a screenshot on my HP laptop?
The fastest way is to press Windows + Print Screen. This instantly captures your entire screen and saves it automatically without needing any extra steps.
Where are screenshots saved on an HP laptop by default?
When you use Windows + Print Screen, your screenshots are automatically saved in the Pictures folder, inside a subfolder named Screenshots.
How can I take a scrolling screenshot on my HP laptop?
Windows does not support scrolling screenshots by default. To capture long pages, you need third party tools like ShareX or similar screenshot software.
Can I edit screenshots after capturing them?
Yes, you can easily edit screenshots using built in tools like Snip and Sketch or Paint. These tools let you crop, highlight and add simple annotations.
Is it possible to customize screenshot shortcuts in Windows?
Windows does not allow you to change default screenshot shortcuts. However, many third party apps let you create and customize your own keyboard shortcuts.
Why do my screenshots look blurry or low quality?
Blurry screenshots usually happen due to incorrect display settings or low quality formats. To fix this, use PNG format and make sure your screen resolution is set properly.
How to screenshot on HP laptop?
You can take screenshots in several ways depending on your needs, such as using Print Screen, Windows + Print Screen, or Snip and Sketch for more control.
How to screenshot on HP Chromebook?
On an HP Chromebook, press Ctrl + Show Windows key to capture the full screen. For a selected area, press Ctrl + Shift + Show Windows key.
How do you take a screenshot on an HP laptop without a Print Screen button?
If your laptop does not have a Print Screen key, you can use Windows + Shift + S to open the snipping tool and capture any part of your screen easily.